|
Hard Door Crack Brace:
MODEL:
M966, M966A1, M996, M996A1, M997, M997A1, M997A2, M1025, M1025A1, M1025A2, M1026, and M1026A1
SUBJECT:
Armored Door Cracks
DEFICIENCY:
Reports from the field indicate the armor doors are cracking due to stress created by the door being pushed open beyond the limits of the door stop, flexing the door and eventually creating a crack.
COMMENTS:
A procedure has been developed to fabricate a reinforcement bracket to mount on the weak area of the door. This bracket should retard further cracking at that location. Fabrication and installation of the bracket can be accomplished in the field using the following materials, parts, and procedure.
MATERIALS/PARTS:
5310-01-254-4284 Locknut 4 per door
9515-00-237-1885 Sheet Metal AR
5305-00-267-8953 Screw 1 per door
5310-00-809-4058 Washer 1 per door
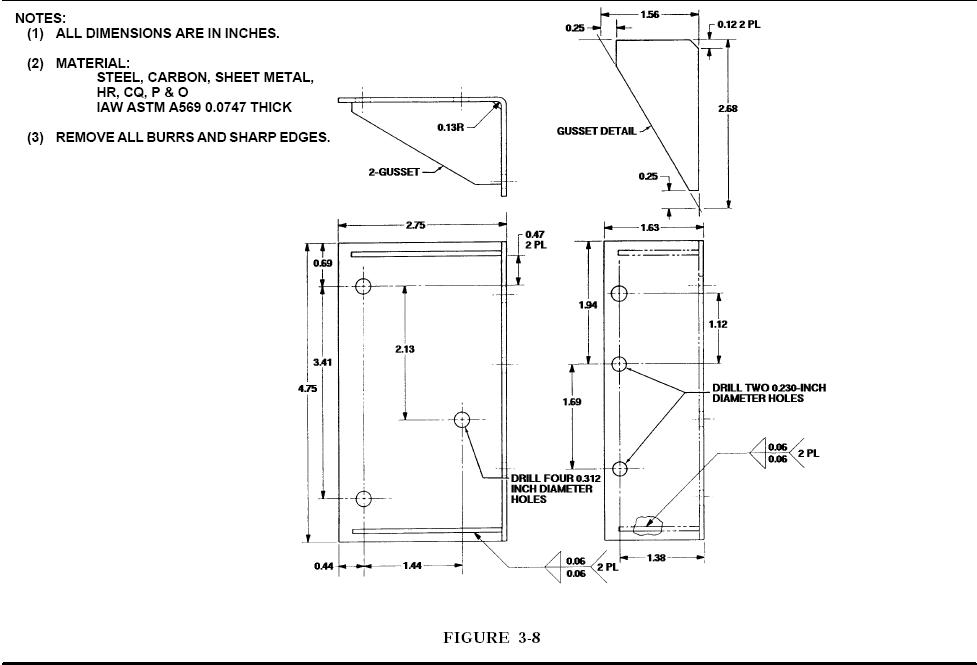
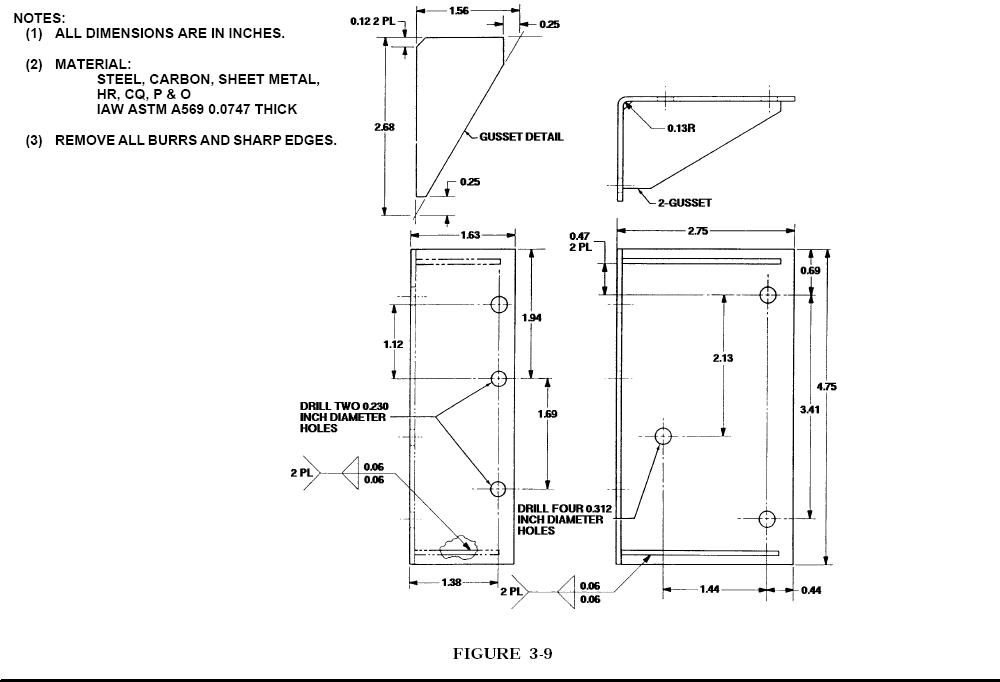
PARTS TO BE FABRICATED:
- To fabricate door hinge reinforcement bracket for left door, refer to figure 3-8.
- To fabricate door hinge reinforcement bracket for right door, refer to figure 3-9.
- Spot-paint fabricated brackets IAW TM 43-0139.
PROCEDURES:
NOTE: This procedure is for top door hinge area cracks only.
- Remove door from vehicle (refer to TM9-2320-280-20).
- Remove door stop bracket and shim, if installed, from inside of door (refer to TM9-2320-280-20).
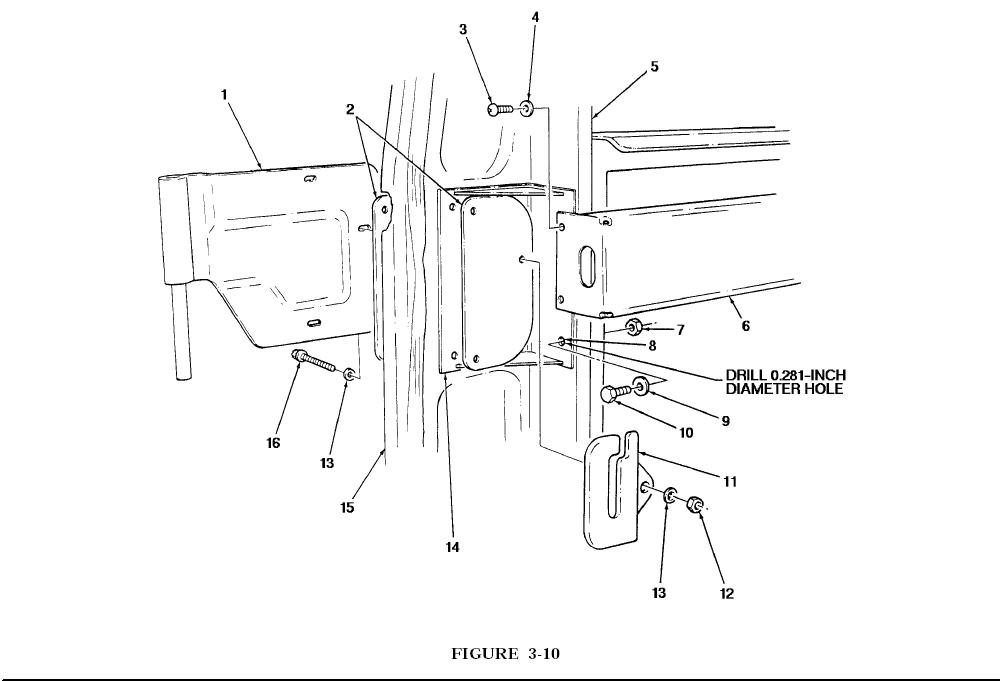
- Remove two screws (3) and washers (4) from door latch tube (6) on side rail (5) next to hinge (1). (see figure 3-10)
- Position door hinge reinforcement bracket (14) between side rail (5) and door latch tube (6) and install two existing screws (3) and washers (4). Do not tighten screws (3).
- Install door hinge reinforcement bracket (14) to door (15) with three existing screws (16), washers (12), outer and inner shims (2) if removed, door stop bracket (11), three washers (13), and NSN 5310-01-254-4284 locknuts (12).
- Tighten screws (3) installed in step 4.
- Drill a 0.281-inch diameter hole in side rail (5) using the existing hole (8) in reinforcement bracket (14) as a guide.
- Secure door hinge reinforcement bracket (14) to side rail (5) with NSN 5305-00-267-8953 screw (10), NSN 5310-00-809-4058 washer (9), and NSN 5310-01-254-4284 locknut (7).
- Install door (refer to TM9-2320-280-20).
- Adjust door (refer to TM9-2320-280-20).
PUBLICATIONS AFFECTED:
TM9-2320-280-20
TM9-2320-280-20P
TM9-2320-280-34P
LEVEL OF MAINTENANCE:
Unit
|
