|
Make Your Own Mechanical Wastegate Controller:
Since I've been throwing wastegate codes (primarily overboost), I figured that I would get off the dime and go to a mechanical wastegate controller.
With that being said - I have purchased a Heath Turbomaster controller and it's sitting in my garage waiting to be installed. However, curiosity has gotten the better of me and I've also tried to see what it takes to create a home made mechanical wastegate controller.
The cost - 8 bucks in parts. Yes, that's right. 8 bucks in parts, and you'll have enough parts to make two of them. So - if you split it with a buddy, you'll pay (excluding labor) 4 dollars each.
The idea came from the guys at the Diesel Place, where someone modded the truck (side mounted turbo) version in a similar manner.
Starting off - the parts:
- Qty 2 #49 compression springs from Ace Hardware. The dimensions are 3.75 x 0.75 x .080
- Qty 2 3/8" x 1 Washer
- 1 Pair of 10" Battery hold down J-hook bolts from an auto store. I got the pair for $4.89 from Checker/Schucks/Kragen
You also need a dead vacuum wastegate controller, a pair vise grips, a 1/4 - 20 tap, and some lubricant to cut the threads easier.
Starting off - The wastegate controller is two can halves that are pinched together using a rolled seam. In between the can halves is a rubber sheeted diaphragm that can keep a vacuum.
Take a vice grip to literally roll the seam away with brute force, or use a grinder to grind the seam off. The brute force method is a lot easier - it takes about 5 minutes to roll 1/2 of the seam off. Once that happens, you can separate the halves.
From there, the steps are below attached to the pics.
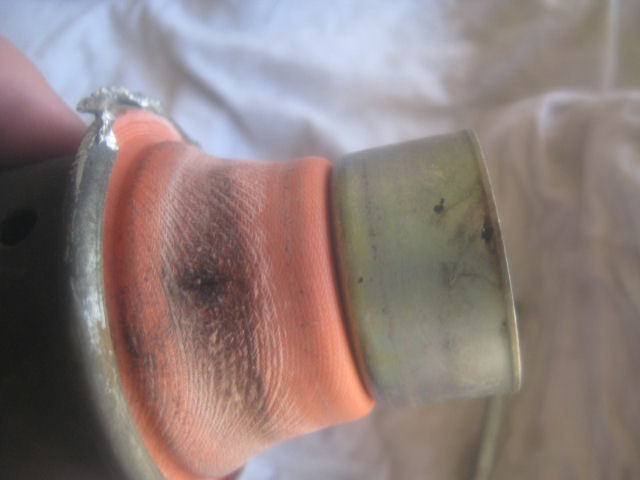
This is what happens when your wastegate controller goes bad - a tear in the rubber coated diaphragm occurs. Just pull this off the can half.
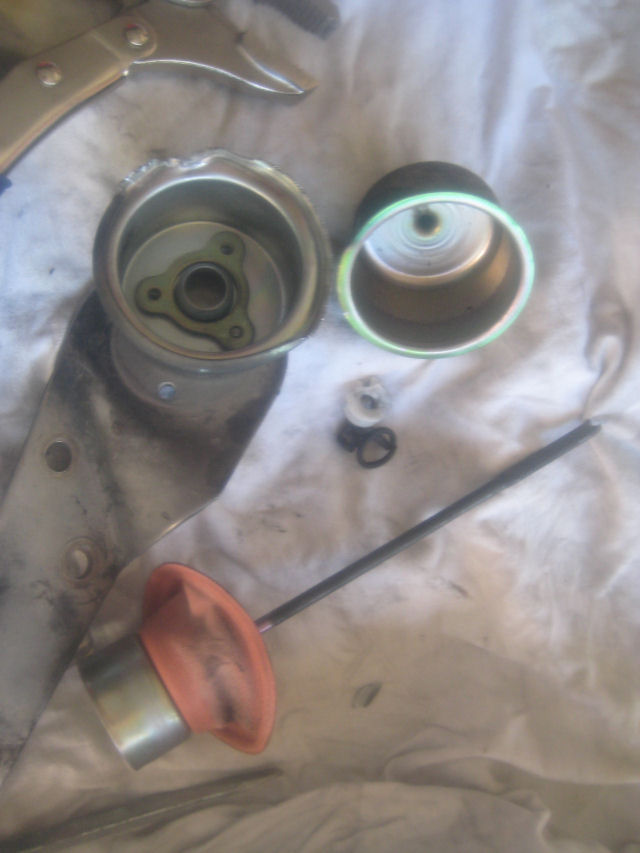
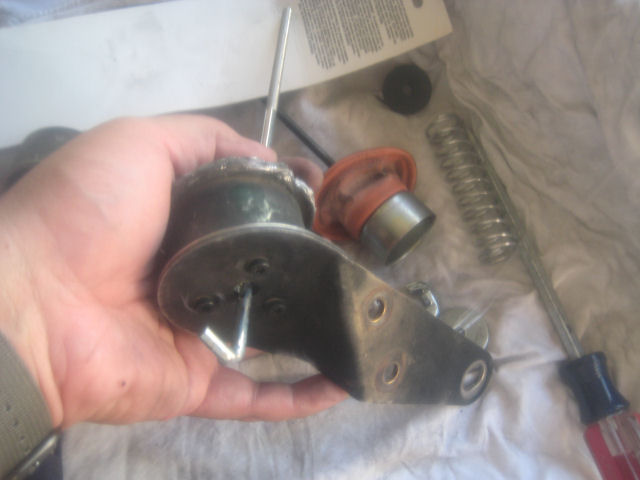
The entire wastegate assembly is now apart. Use the vise grips to kill the C-Clip end as well as the gasket on the rod itself. You won't need either any more.
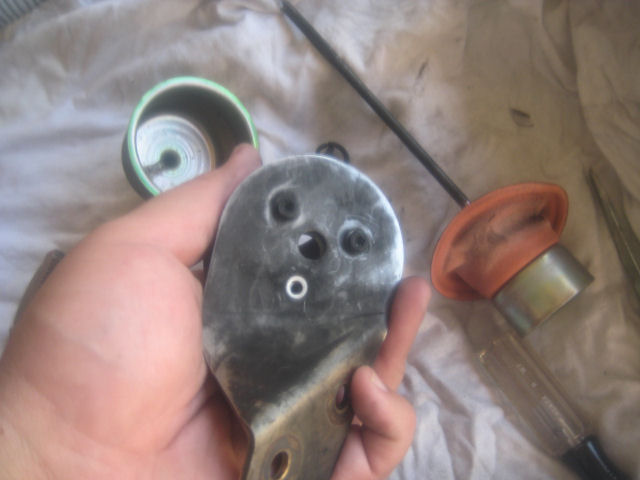
Start screwing in the bracket against the can half. Use the triangular support piece to sandwich the can.
The reattached support piece is now screwed in with the can sandwiched between the bracket and the support piece.
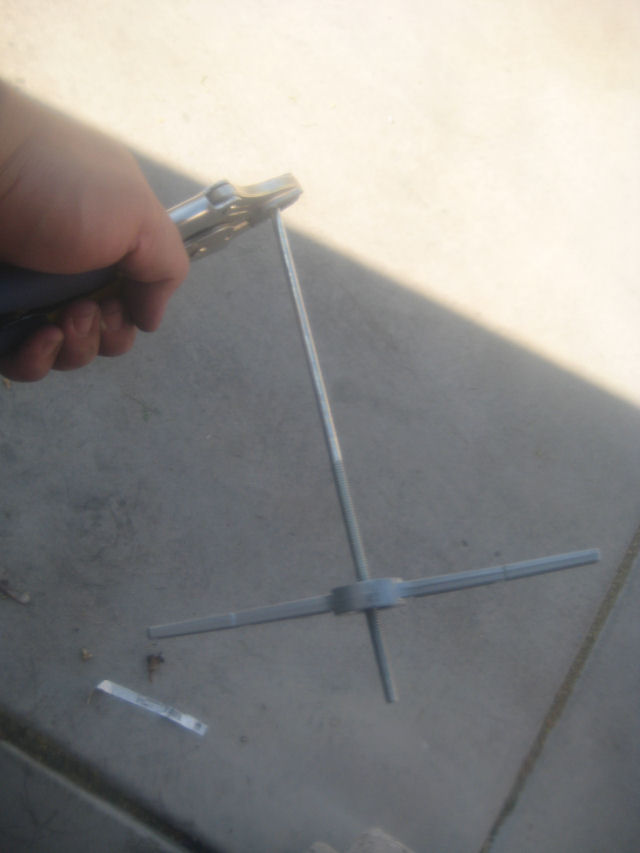
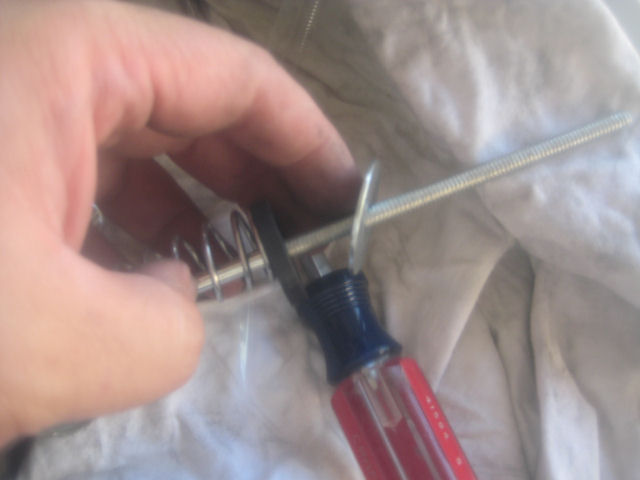
Take a 1/4 - 20 tap and run the threads down further by 3 inches.
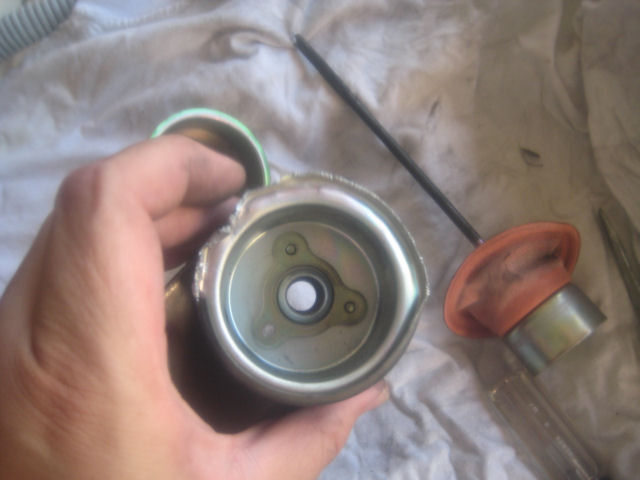
Insert the modded threaded rod into the can half. The J-Hook needs to be next to the bracket.
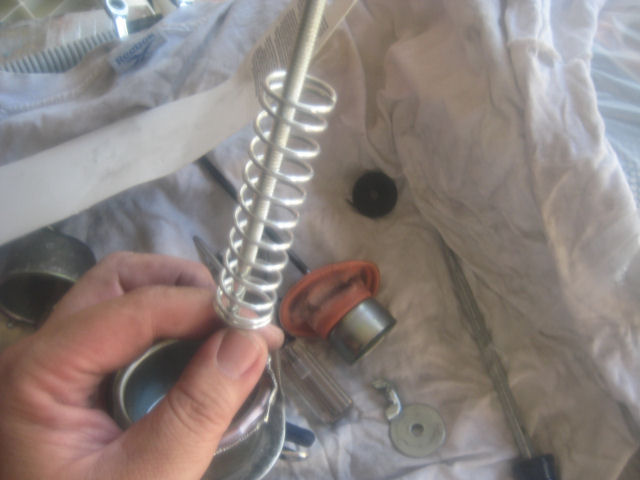
Push the spring down the threaded rod.
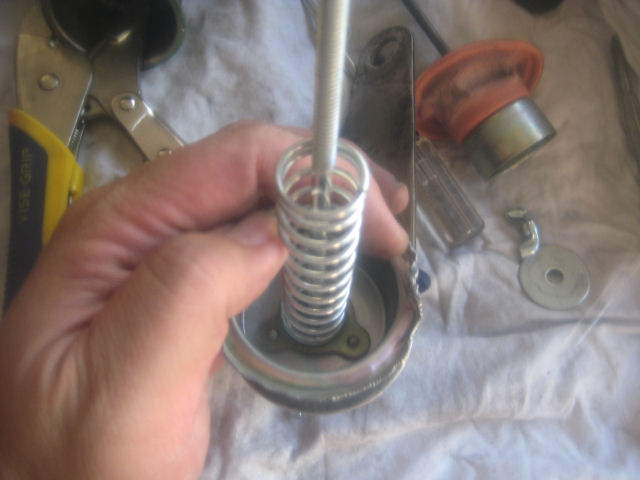
Insert the spring into the can half. Note that the spring will center itself in the nub of the can half where the wastegate arm will go through.
Hard rubber washer then the metal washer then goes down the threaded rod.
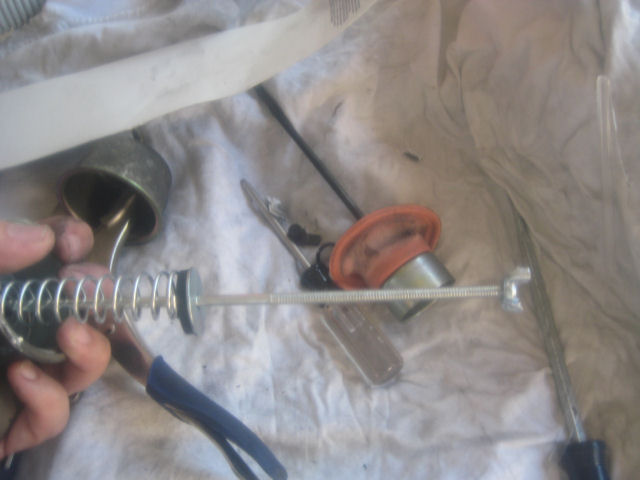
The spring, nut, hard rubber washer, metal washer, and wing nut. You may substitute a nylock nut in place of the wing nut.
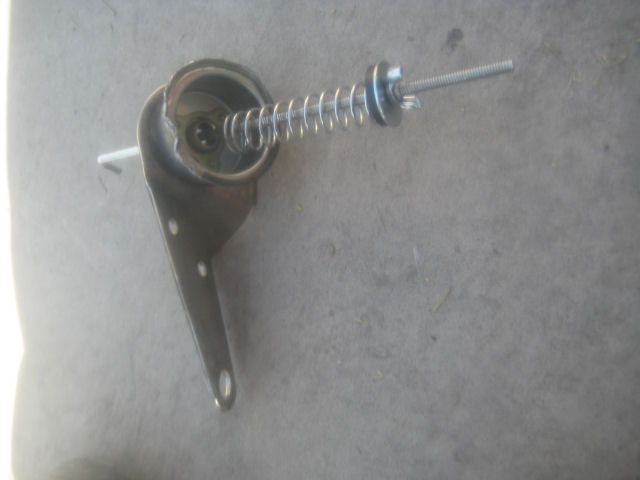
The completed wastegate controller.
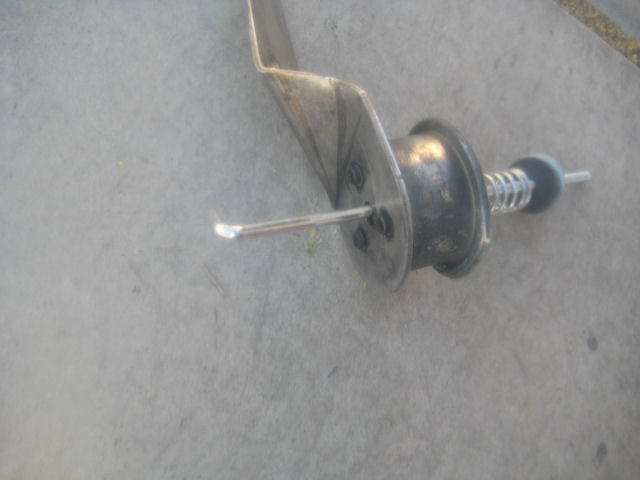
A second look to the wastegate controller
Install and Adjustment:
This is assuming you have taken out your old unit. If not, the basic steps are:
- Take off the doghouse
- Take off the engine cover
- Take off the turbo shield
- If you have a head cooling kit - take off the #8 plate. You may need to save the gasket. If not, the gasket can be had for under 2 bucks at any Chevy dealership.
- Take off the two bolts holding in the old vacuum wastegate controller
- Take a zip tie and kink the old vacuum line. Or - you can take two zip ties and an airsoft BB and block the vacuum line.
- Take your rebuilt unit, insert the J-Hook into the wastegate arm
- Bolt the replacement controller into the turbo assembly.
Once it's installed - tighten the spring down to about 2.5 inches of overall spring length. Then, put the turbo shield back, batten down the engine cover and put the doghouse back on.
Now - you simply can just adjust it through the engine compartment. Just adjust the wingnut through the gap that's between the firewall and the glow plug controller.
Your goal - no more than 12psi boost max. The safe rule in hard acceleration should be no more than 9-10psi.
Make a quick run down the street. You'll know within 100 yards whether you're making the boost.
-Steve
Here's some initial findings on it.
- Mechanical wastegate controllers are nice. No vacuum system to blow things up for you, it always works, and it's adjustable.
- The boost is adjustable to about a max of 12-15psi. I've currently got mine set at 12.
- The power increase is more subtle than the boost fooler. With the boost fooler, it's a harsher spool up, then it adjusts. With the Turbo Master, it's a smoother spin up.
- You do feel the power increase. Combined with a boost fooler, I was able to get the unit to accelerate a bit better than the boost fooler alone. Timed runs will occur tomorrow afternoon.
- This unit is really for towing. You get a very smooth and linear power spin up. Even after pounding the crap out of the unit today, along with tuning it from 8psi to a max of 12psi, I still registered 10.4 MPG. Not bad. I was able to accelerate up my test hill (7th Street near the Pointe Tapatio Cliffs resort) a tad better than using the boost fooler. I actually had more power than the boost fooler alone.
I have a theory, and I'm thinking I need to call Westers or Heath. I'm thinking that a mechanical wastegate plus a boost fooler may equate to less fuel turn back until IAT's hit a certain point. No defueling means you get more power (more air + more fuel).
It's definitely a good add on. Worth it if your vacuum actuated wastegate is going south.
-Steve
|
